Right now, when you host a wreath party with 6 or more guests, you'll receive your wreath kit for FREE!
When you host a wreath party, you and your guests will preorder the wreath kits of your choice from our website.
We will email you a link to our WREATH PARTY VIDEO, that you can play at the party. This video will teach you, step by step, how to make the wreaths.
**YOU MUST EMAIL US AT DESIGNERDIYSHOP@GMAIL.COM TO NOTIFY US THAT YOU WILL BE HOSTING A PARTY.
As the host, it is up to you, if you'd like to order all of the wreath kits for your guests together and have them shipped directly to you, or your guests can individually shop our website for their wreath kit and get it shipped to them.
**ALL WREATH KITS MUST BE PURCHASED FROM DESIGNER DIY.
When you have 6 or more guests attend your party and all of them have purchased their wreath kits from our website, your wreath kit is FREE!
If you had already purchased your kit before 6 of your guests ordered, we will refund you for your kit.
Right now, our WREATH PARTY VIDEO teaches you how to make our Beginner Wreath Kits.
Check out our kits here: Beginner Wreath Kits
These kits include:
If you have any questions, please email us at designerdiyshop@gmail.com.
]]>
Whether you are making Easter wreaths, Easter bows or decorating around your house there are so many fun color options to choose from. The classic pastels, the chocolate browns, the royal purple and of course carrot orange. Summer and Sharon have put together beautiful combinations. From pastel Easter to a carrot garden to classic Easter Bunny, there is something for every personality.
Our burlap bunny collection is perfect for the classic, country Easter. This collection is all about textures. With the burlap in the bunny, the jute open weave ribbon, with orange suede and textured, orange herringbone. The 4" orange and green plaid ties it all together.
Our pastel and brights is all about traditional Easter. Pastels with bright colors may seem a little contradictory but look how great they are together! In this classic collection we included Easter eggs, adorable cotton tail Easter Bunny, polka dots and lots of glitter! The ribbons and signs in this collection have so many amazing details that just don't show enough in pictures. From raised polka dots to fuzzy, wired edges to fluffy pom pom tails. I love how many colors all come together so beautifully in this collection.
Of course there would be no Easter without Jesus. This religious collection ties the true meaning of Easter elegantly with the classic bunny. Both of the signs featured here are thoughtfully detailed and have beautiful shades of purple and lavenders.
]]>
Whenever we start to design a wreath, first we pick out our sign or decor that we will be using on it. This gives us an idea of what colors to coordinate with it.
Our most popular wreaths and wreath kits are a design that uses 9 different wired ribbons that we add onto the top ring of the wreath, once all of our mesh has been added to the wreath form.
You'll want to pick 9 different WIRED ribbons in a variety of widths. (1.5", 2.5" or 4")
We use only 1 yard of each of these wired ribbons, so you don't need a lot.
Since we cut these ribbons into 12" pieces, you'll end up with 3 pieces of each ribbon. Our wreath forms have 8 bendable pine branches on the top ring that we add ribbon onto, in groups of 3's.
We will be dividing our ribbons into 3 separate groups. (You'll have 3 groups of 3 ribbons)
When choosing your ribbons, try to keep in mind how they will be divided up. You need a variety of colors, solids, patterns, glitters, etc. and you will want to spread them out. (Example: you don't want all your solids together in 1 grouping)
We try to divide our polka dots or plaids so that each grouping has a variety of patterns and colors.
I hope this helps explain our thought process when we design a wreath. If you have any questions, you can email us at designerdiyshop@gmail.com.
Are you new to crafting? Wanna know all the tips and tricks? We've organized a list of our favorites that we use every day. We mainly make wreaths here at Designer DIY but most of these products you can use for just about any type of craft. Here is our list of must-haves for crafting! (This page includes affiliate links – my full disclosure statement is available {here})
When needing so many pieces of mesh for wreaths, these are a must have to literally CUT your time in half. You see what I did there? :)
Here is the link to our favorite cutters... Rotary Cutters we love!
You can't have one without the other...
If you want to use a rotary cutter for your materials, you're going to want to get an amazing cutting mat!
Here is the link to our favorite cutting mat...
We use the 18"x24" size :)
Keep all your beautiful ribbon from fraying. Glide some Fray Check right across the cut edges of your ribbon for a perfect sealed edge. This stuff is amazing and will keep your projects looking like new for years!
Get it here- Fray Check, Dritz – Designer DIY (shopdesignerdiy.com)
Do you use a lot of hot glue?
We use our hot glue gun for just about anything...and when we need to step it up a notch...we use our HOT GLUE SKILLET!!
We use Gorilla brand glue sticks and LOVE them!
Get your glue sticks here...
If you need a good hot glue gun, here is a link to one we love!
Click here to order: https://amzn.to/3wM8TTf
Celsius Peach Mango Green Tea to the rescue! It's AMAZING!
The links in this blog are affiliate links for Designer DIY.]]>
Sharon’s Top Ribbon Choices for Easter 2022
If you know Sharon, it’s no surprise her favorite Easter collection has aqua in it. She is a true believer that aqua works for every holiday. In this collection she started with the adorable bunny truck ribbon that has so much detail. The little carrots, the cute bunny tail and I love that this ribbon has a white fluffy edge to really capture the idea of a fluffy white bunny. To bring out the load of carrots this little bunny is taking to market, Sharon added a bright carrot ribbon and an amazing three-dimensional burlap carrot. I like this carrot because it adds depth and texture to a project or your décor.
When she added the dramatic touch of bold white and black stripes, glitter harlequin and TWO-SIDED polka dot…WOW! I love how the orange of the carrots is so striking against the black and white. To bring out the aqua of the truck she added the sweet touch of aqua pin dot. This collection definitely proves Sharon is right, aqua is amazing for every holiday.
Summer’s Top Ribbon Choices for Easter 2022
I feel like I was more than a little inspired by Sharon’s collection. I really do love the way every color pops when it’s with black and white. I used the classic orange carrot theme with a twist. When I saw that a ribbon was 4” wide, was two-sided with plaid and polka dots I knew I had to use it. It has everything I love in 1 ribbon! This is the ribbon I used to build this collection around. I then chose another 4” dot ribbon. If you haven’t guessed yet, 4” wide wired ribbon is my all-time favorite width of ribbon. The carrot décor ties in perfectly with the orange in the plaid. I really wanted to bring more attention to the carrot theme, so I added these other fun wired orange ribbons to make it very carroty….that’s a word right?
Remember when I said I wanted to add a twist to my collection? With cute, curly picks I took that literally. Adding picks to your Easter wreath or any Easter project is so easy and really gives it a more finished look. These picks are fully wired so it makes it even easier to add and shape them into anything.
Here is a list of all the items we used in these collections:
We'll explain it all to you here. All the different types of deco mesh, best ways to cut them, where to buy them, etc...
Let's start with the basics...
Deco mesh is a type of colorful, bendable ribbon made from a mesh-like fabric. It is used for DECO-rating and creating beautiful projects like wreaths, swags, centerpieces and much more!
Almost all deco mesh is made with a material called Polypropylene. A plastic type of material. If you order metallic mesh, jute mesh, fabric mesh...they are all weaved with polypropylene (PP).
*If your mesh will be out in the sunlight, the colors may fade over time. We recommend spraying your mesh with a clear coat or UV protectant spray after it is attached to your wreath/swag. Preferably before you add the ribbon or decor on top of it.
*ALL MESH FRAYS* Yup, I said it...no matter what type of mesh you buy, it will all fray. Some more than others...we recommend not purchasing your mesh from the dollar store or anything titled Budget Mesh...it's cheap for a reason.
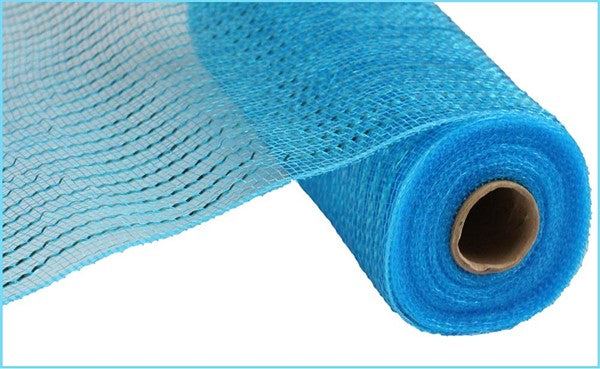
The first mesh we will talk about is your basic Solid Deco Mesh. This mesh comes in several different sizes and just about any color you can imagine. The best way to cut this mesh is with a wood burning tool to limit how much it frays. (Make sure to do this in a well-ventilated area). This mesh is weatherproof, but the colors may fade over time in direct sunlight. We recommend spraying your mesh with a clear coat or UV protectant spray after it is attached to your wreath/swag. Preferably before you add the ribbon or decor on top of it.
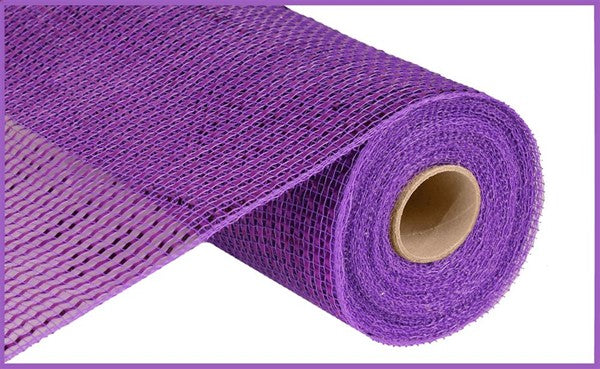
Next, there is Metallic Mesh (Foil Mesh). This is the same solid propylene mesh but has narrow strips of foil running throughout it. This can also be cut with a wood burning tool to prevent it from fraying. Some metallic mesh has more space between the foil, so it looks more striped. Others have the foil strips very close together. This mesh can come all one color, or multicolored.
Check out our Metallic Mesh here.
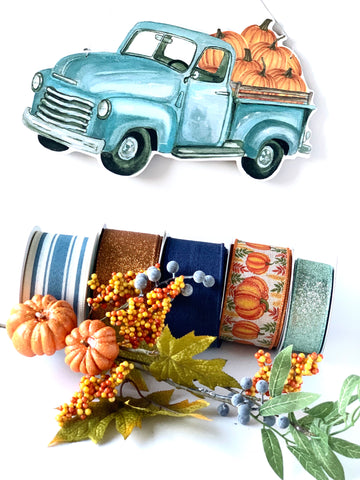
Here is a fun combination of both of these mesh' combined...
Border Stripe Mesh
This is a Polypropylene mesh with foil strips weaved along the borders. This is best cut with a wood burner tool in a well-ventilated area. When using this mesh in a wreath it is best to use the ruffle method. This method makes the edges stand out.
Check out our Border Stripe Mesh here.
Fabric Mesh (Faux Jute Mesh)
This mesh is made with strands of fabric weaved throughout the PP material. There are 2 main types of Fabric Mesh. Striped and checked. Striped mesh has the fabric strips all running the same direction, checked mesh has the strips weaved. Both of these mesh' work amazing! Colors are vibrant and the material is so easy to work with. If you cut this mesh with a wood burning tool the edges of the fabric will burn a little and might darken. Make sure to do this in a well-ventilated area. We cut this mesh with just scissors and it still works great.
Check out our Fabric Mesh (Faux Jute Mesh) here.
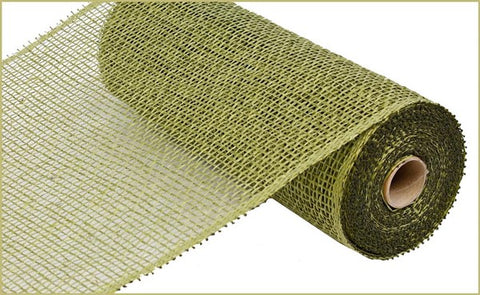
Burlap Mesh (Jute Mesh)
This mesh is also made with PP but has jute weaved throughout. Gives the mesh a more rustic look and comes in several different colors. If you cut this mesh with a wood burning tool the edges of the jute will burn (please don't start a fire) and might darken. Make sure to do this in a well-ventilated area. We cut this mesh with just scissors and it still works great. When you cut this mesh the jute fibers will get into the air, just like when you are working with burlap, so use a well-ventilated area.
Check out our Burlap Mesh here.
Windowpane Mesh (Poly Burlap Check)
This mesh has a cool weaved look to it and is super fun to layer over a solid color. Made with Polypropylene. It's best to cut this mesh with a wood burning tool in a well-ventilated area. This mesh will fray ALOT if not heat sealed.
Poly burlap is made with Polypropylene but has a thicker styled weave, so it looks more like burlap. This mesh is best cut with a wood burning tool in a well-ventilated area. This mesh will fray ALOT if not heat sealed.
Best of all this ribbon is weatherproof and the colors are so vibrant!
This type of mesh is most commonly used for making these popular flower wreaths.
Check out our Poly Burlap Mesh here.
This mesh is made with PP and has a fluffy cotton weaved through it.
Check out our Snowball Mesh here.
Make sure SUBSCRIBE to our YouTube channel to watch our FREE tutorials!
]]>
When you are deciding which shade of green to use why just choose one? I combined light sage and olive to play the different depths of color off of one another. What inspired me for this combination was these beautiful detailed signs. I love the shades of greens used for the delicate leaves. I added the creams and grays to accent the 3-D berries and banner. These signs give such a peaceful and delicate feeling that I wanted the ribbons and mesh to be natural but still have depth by adding the moss mesh and the thick, sequined, moss ribbon. When I saw this winter pick with it's pine cone and berries I knew it would add the perfect accent. It is not often you find a holiday pick in these colors so I knew I had to have it in this combination.
Want to add more color to your design but still be subtle? Here I used predominately reds and creams. Which are always lovely together but I really wanted to have some green in there! So I added this weathered reindeer sign that has a very unique and cool green color. I wanted to accentuate this color by adding the linen dot and deep green mesh. Of course I also needed a pick to add that necessary dimension. So I went with this pine greenery with natural pine cones and antiqued bells to flow with the rustic feel of the sign.
I know there is nothing unique about using red and green for Christmas. But what I love about this collection is the eucalyptus for winter! I think the shape of the leaves on the signs and the shape of the eucalyptus are a perfect pairing. The burlap and white striped mesh keeps the natural and neutral feel of the signs. These soft reds and soft greens together make this combination bright and inviting.
]]>
Christmas green, kelly green, emerald green...whatever you call it this green is a bright and cheerful color to add to your Christmas. I paired white and Christmas green in this collection to resemble a snow covered meadow. The snow flocked pine represents the surrounding forest that is covered in a snowy blanket. This Christmas green and white combination is perfect for a clean, crisp holiday.
Plaid Christmas trees...so cute! I not only love the different styles of plaid used on the Christmas tree ribbon but I love the colors. Red, green, gold, cream and black are so festive together. I paired it with our ready made wreath to bring together the pine Christmas tree motif. The wide red grid ribbon and the red/green/gold plaid go with the square check patterns of the plaid trees. That is also why I added the red fabric mesh because it's design is a tiny red grid. The metallic in the green and striped mesh bring out the gold sparkle accents of the ribbons.
Rejoice our Savior is born! Although this collection is similar to the one above I went more natural feel here. This hand painted wood sign has so many beautiful details. The holly ribbon with red berries ties with the greenery and berries both on the sign and the pine stem. The flocked green Christmas tree ribbon blends with the different shades of green on the sign. I do realize I put two different snowflake ribbons in this collection. I put the 4" linen with red glitter snowflakes in because it is wide, gorgeous and makes a statement in contrast to all the small patterns in the other ribbons. The 2.5" wide snowflake ribbon has two shades of red which ties in the natural variances of red in the berries. The linen and burlap mixed with snowflake and flocked snow feels like you are taking a nature walk through a stunning snowy forest.
]]>
When we think of using navy in our decorating we usually think of it as a color only for patriotic holidays: 4th of July, Flag Day, President's Day, etc.
Now navy is used for every holiday! Even Christmas? Yup, even Christmas. Below I will show you some great color combinations to put with navy for fall and winter.
(If you love any of the items featured in this blog post, and why wouldn't you, they will be listed at the bottom of this post. You are just one click away from adding them to your cart)
"Orange" you glad navy is so popular?! I love combining burnt orange with navy to create a very warm combo. These two deep colors together just feel like a warm hug. I added ivory to this group to add just a pop of bright. If you love to just stay with warm colors navy and deep orange look great together even without the pop of bright.
Mix it up baby! This group is fabulous with the mix of all different shades of blue. The cute truck sign is closer to an aqua color while the frosted blueberries in the pumpkin pick bring out the farmhouse blue shades. So of course I want to bring out all these colors with our ribbons. The farmhouse blue stripe really goes great with the deep navy linen. The aqua glitter brings out the green shades of the truck and leaves in the pick. Don't be afraid to mix different shades of the same color family.
A blue Christmas never looked so good. The dark navy color looks so deep and regal. And did I put silver and champagne together? Yes I did! Using silvers and golds together is no longer a designing faux pas. These sparkling colors mixed with navy are perfect for an elegant and regal Christmas. The 4" ribbon is a solid navy with a champagne glitter grid overlay that is a perfect match for the navy with champagne glitter snowflakes. I added the pine cone picks because the natural color of the pine cones mixed with the silver glitter frosting tie in perfectly with this collection.
For this navy, teal and moss combination I started with one ribbon as my inspiration. Can you guess which one? The navy with teal mittens and moss trees. I have always loved this ribbon. This color combination is so unique for Christmas and I just think its gorgeous! The coordinating fuzzy plaid throws in a touch of red which I like because it breaks of the blues and greens. The teal velvet and the wide, sequined knit moss ribbon scream winter! This combination is for all of you that love that cozy winter feeling.
]]>